
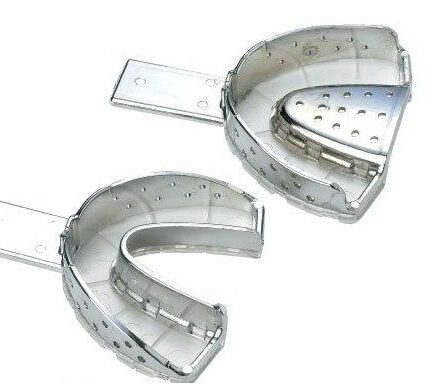


Corident Corimplant Trays
Original price was: $ 178.75.$ 119.93Current price is: $ 119.93.
There is no risk of change (Solid aluminum BODY). It is possible to separate the Tray bottom by parts and make a hole exactly on the screw zone since screw zone can be check during getting the impression. Convenience to use. Safety. Fit strong and secure. High Precision.
| Quantity | Price |
|---|---|
| 2 - 5 | $ 118.73 |
| 6 - 10 | $ 117.53 |
| 11 - 20 | $ 115.13 |
| 21 - 50 | $ 113.93 |
| 51 + | $ 111.53 |
Features
- There is no risk of change (Solid aluminum BODY).
- It is possible to separate the Tray bottom by parts and make a hole exactly on the screw zone since screw zone can be check during getting the impression.
- Convenience to use.
- Safety.
- Fit strong and secure.
- High Precision.
Description
CORIMPLANT TRAY is fine quality aluminum impression trays specially designed to make impressionsstronger and secure.
Aluminum is light in weight thus making it easier for Implantologists.
It is harmless to humans since made of aluminum and possible to disinfect in the high temperature.
COMPOSITION :
- Made up ofbiocompatiblealuminum.
ADVANTAGES :
- Convenience to use.
- Safety.
- Fitstrong and secure.
- High Precision.
- It can prevent secondaryinfection thanks to auto-crave disinfection.
- It can reduce chair time for patients.
- More economical than individual tray and disposable tray.
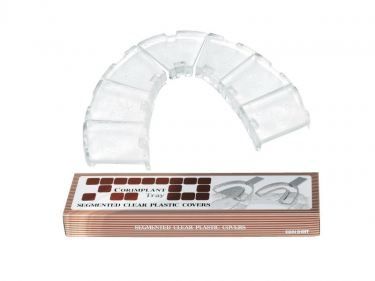
- Corimplant Tray bottom is made of transparent plastic material that is disposable and changed.
- Convenient to get the impression without making individual tray since the plastic part can be detached from the implant screw.
- It is possible to separate the Tray bottom by parts and make a hole exactly on the screw zone since the screw zone can be check during getting the impression.
- No risk of change (Solid aluminum BODY).
- Disposable Plastic Covers– Transparent plastic covers for the bottom parts composed of 7 pieces can be separated from metal tray.It is convenient to get the impression without making individual try since the plastic part can be detached from the implant screw.
- Economic– CORIMPLANT TRAY is more economical than other individual and disposable trays.
- 2 Medium (U/L)
- 2 Large (U/L)
- 105 Units x Medium (M1-M7) x 15 sets each
- 105 Units x Large (L1-L7) x15 sets each
- This product does not carry any manufacturer/importer warranty
Key Specifications
Packaging
1 Complete Set of Implant Trays:
1 Complete Set of Segmented Clear Plastic Covers (210 units):
Direction of use
7 Pieces of Plastic covers are used for a tray.
STEP 1:Before Impression condition of Implant patient

STEP 2:With screws in the mouth beforeImplant Impression

STEP 3:Insert transparent cover on the tray. Insert the cover avoiding the part to get the impression


STEP 4:Try to put on the tray in the mouth. Check the location of tray cover part and screw part and check if the screw protrudes out.


STEP 5:It is ok to detach the Screw part Cover and make a hole on the screw zone

STEP 6:Get the impression of Putty Type.


STEP 7: Insert the cover from the inner side of the tray

STEP 8:Widen the gap between the cover using a detaching tool and detach the cover. It is easier to detach the cover if you close up the try slightly with your hand.

STEP 9:Put the Putty Type impression material in the tray

STEP 10:Cover the Putty with plastic wrap

STEP 11:Get the impression of Putty and let the screw part be protruded.


STEP 12:Mix the Injection Type and put it on the Putty impression.

STEP 13:Spread the mixed Injection Type on the part to get the impression in the mouth.

STEP 14:
Get the impression of inside the mouth. Get the impression fixing the screw part is exactly outside.


STEP 15:Unscrew after the impression material becomes hard.


STEP 16:Remove the tray out of the mouth with care.

STEP 17:Bottom side of the removed tray.

STEP 18:Insert the Lab Analog in the Impression and fasten the screw

STEP 19:Pour the gypsum on the Tray.

STEP 20:Pour the gypsum to cover the Lab Analog enough as bulging.


STEP 21:Unscrew and detach the gypsum model after the gypsum is hardened.


STEP 22:Completed Impression model

Impression is taken

Warranty
1. We offer Worldwide Shipping by Courier via Air or Sea mode.
2. Product will be dispatched within 5-7 working days.
3. Delivery will take a maximum of 7-15 days, based on the shipping option you choose.
4. Kindly check customs restrictions and rules in your country for specific products, mostly 99% shipments are cleared and delivered smoothly.
5. For Bulk inquiries or customized manufacturing please contact us.
Product Enquiry
Related Products

Features:
3M Attest Biological Indicator 1264 for EO Sterilization
Box of 100
Biological indicator
Green colour-coded cap
For EO Sterilization
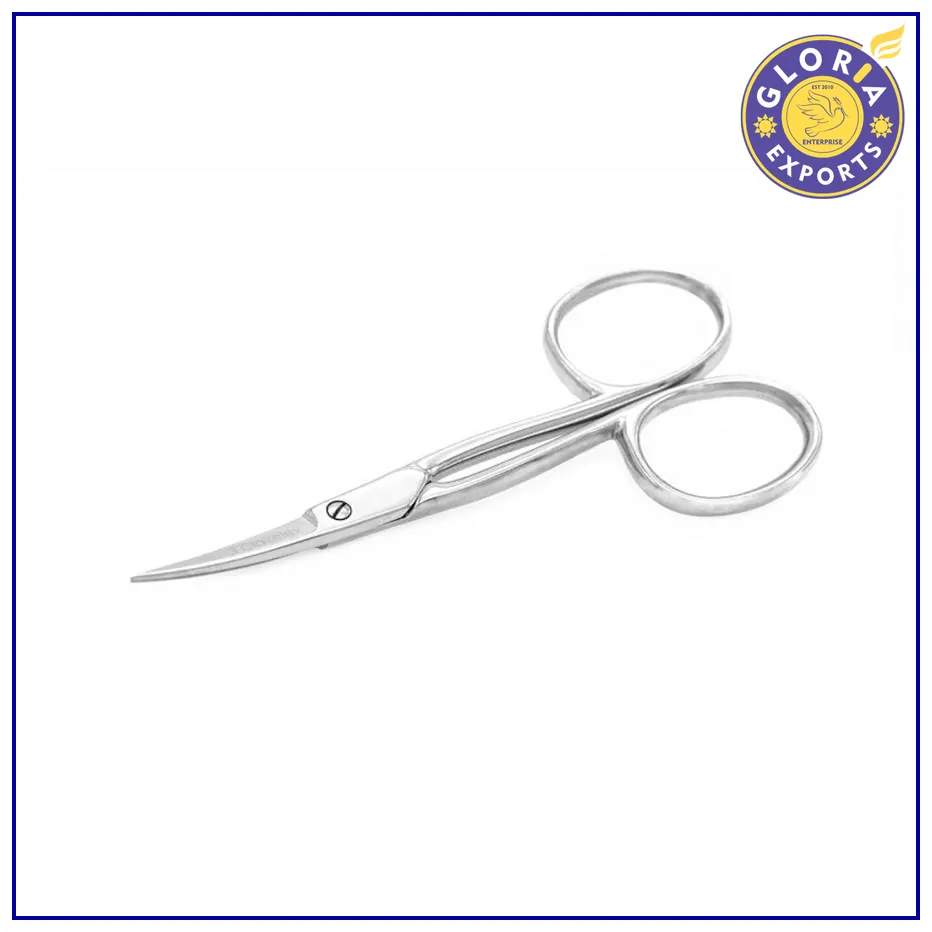
Features:
3M Curved Crown Scissors
Type: Curved
Material: Stainless steel
Lightweight
Easy to Use

Features:
3M Aplicap Activator
Aplicap Activator
For Easy Activation
Lightweight
Durable

Features:
3M Coban Self Adherent Wrap
Width: 1/2/3/4/6 inch
Length: 5 yards
Colour: Tan/Blue
Protect primary dressings

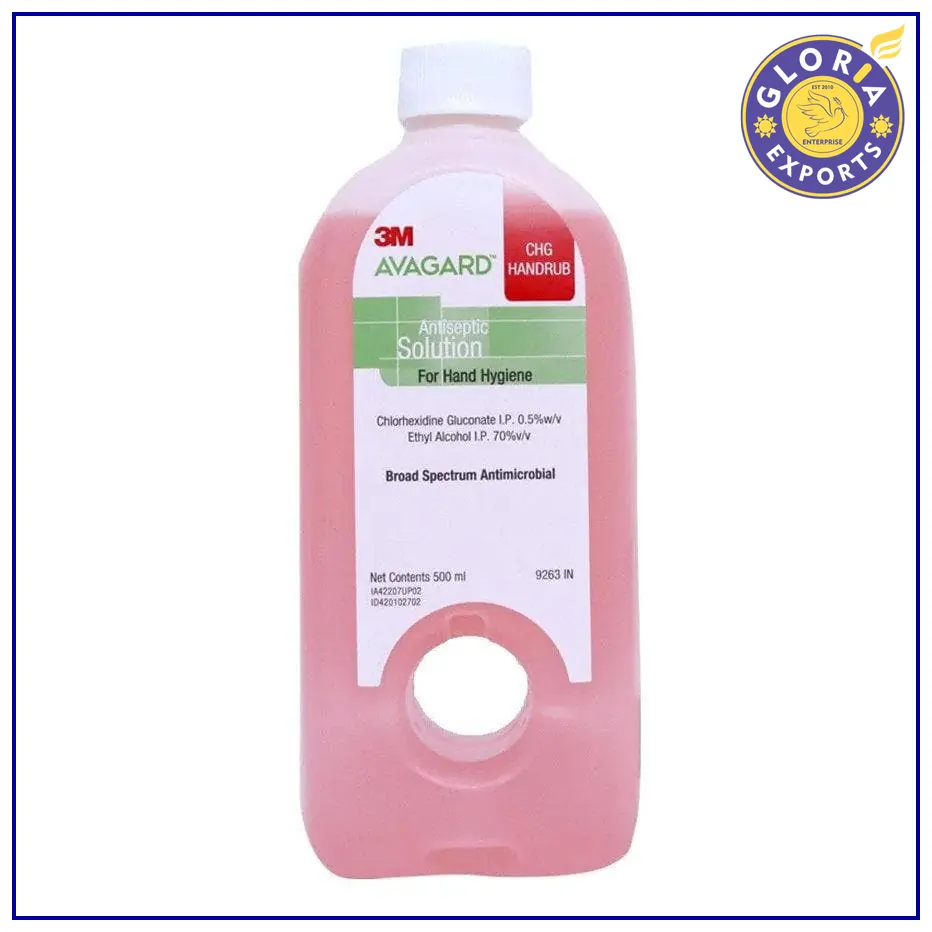
Features:
3M Avagard Surgical Scrub CHG 4%
Size: 500ml/100ml
Surfactants & moisturisers
Broad spectrum
Added moisturizers
Features:
3M Avagard CHG 500 ml Hand Sanitizer – Pack of 10
Size: 500 ml
Rapid skin disinfection
Kills 99.99% of microbes
Protection for longer duration
Out of stock

Features:
3M Cavilon No Sting Barrier Film Wipe
Volume: 1 ml
Type: Wipe
Box of 25
Alcohol free

Features:
3M Clinpro Tooth Creme
Volume: 113g
Strengthens Teeth
Prevents Cavities
Effective Cleaning
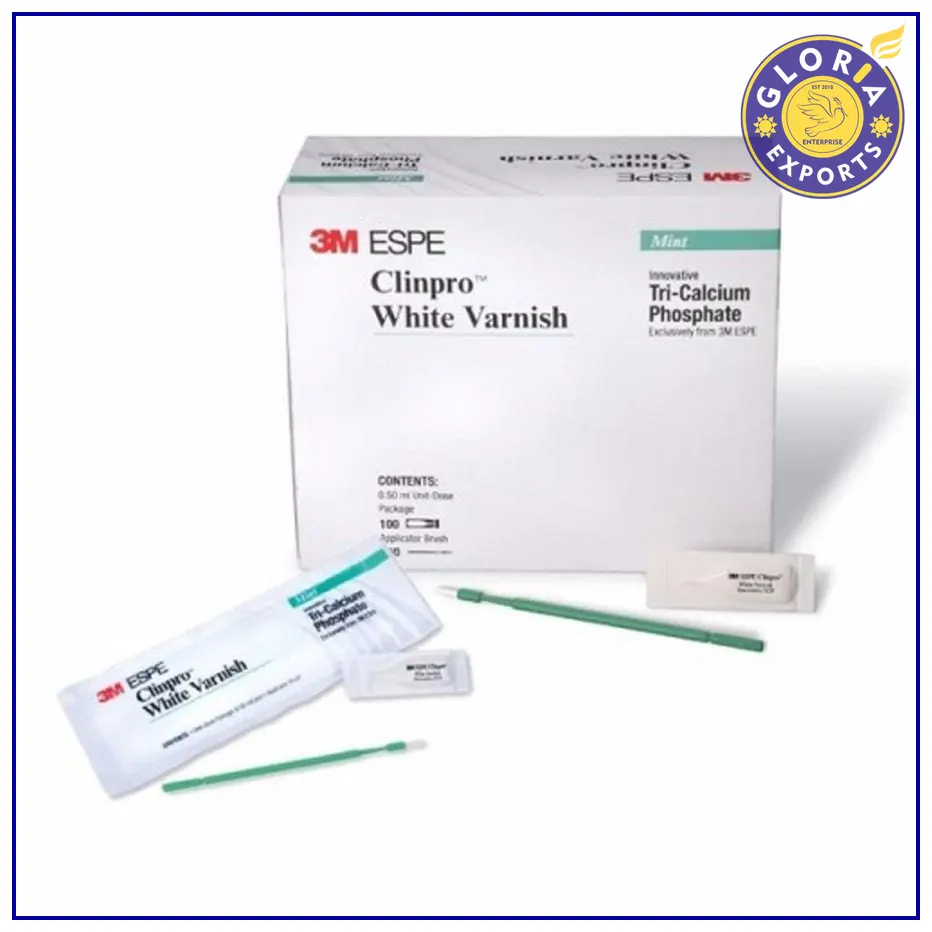
Features:
3M Clinpro Dental Varnish
Colour: White
5% Sodium Fluoride
Steady Fluoride Release
Easy to Apply
Out of stock
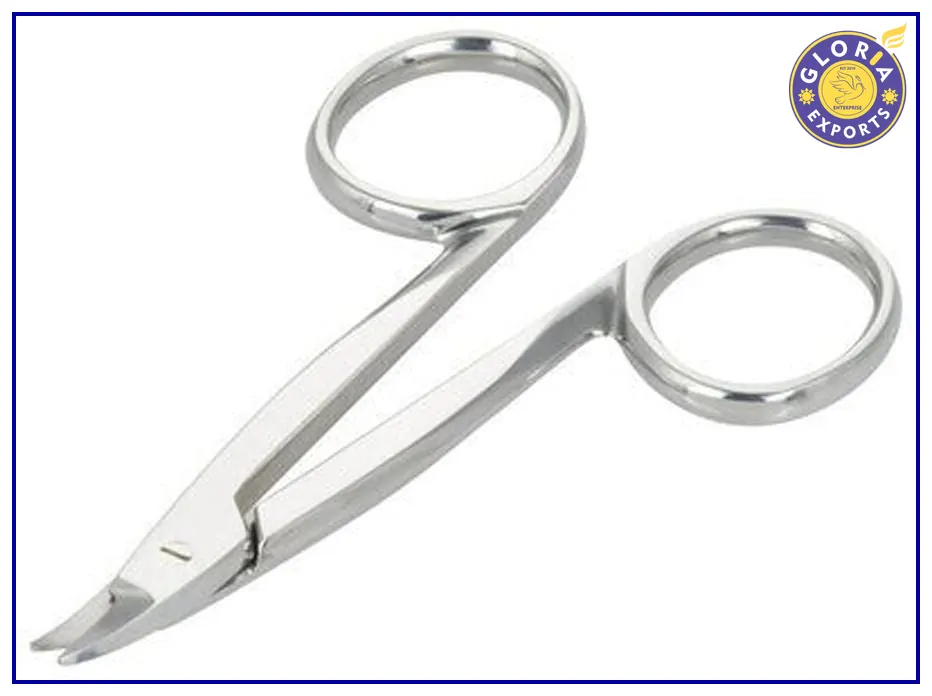
Features:
3M Curved Crown Festooning Scissors
Type: Curved
Material: Stainless Steel
Lightweight
Easy to Use
Features:
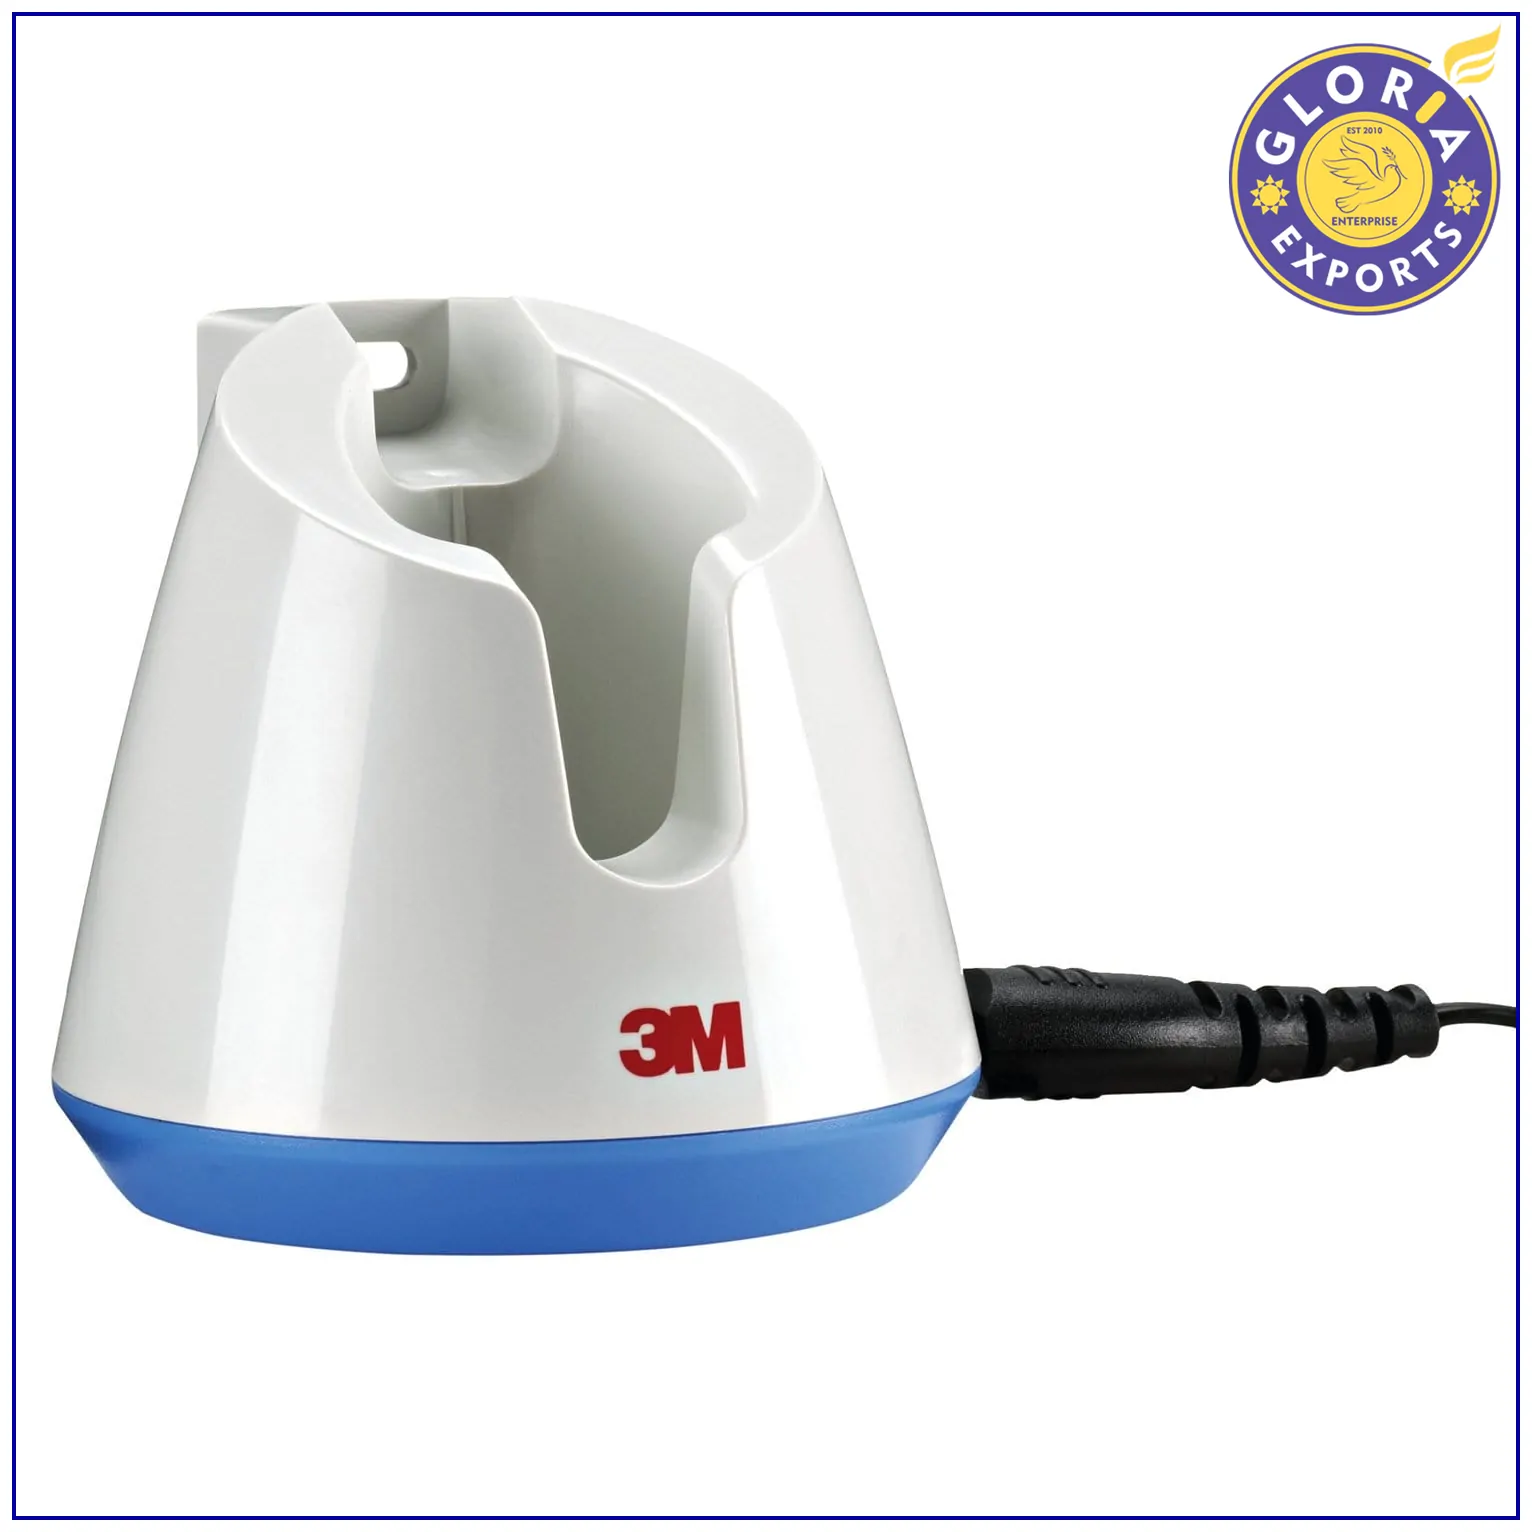
3M Charger Stand for Surgical Clipper – 9683
Charger Stand
Excellent performance
Reduces the risk of infection
Superior design
Features:
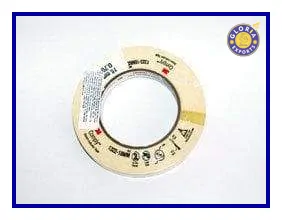
3M Comply Autoclave Steam Indicator Tape
Size: 18mmX55m
Lead free
Steam Indicator Tape
Easy to apply
- Veterinary
- Agro Chemicals
- Category
- Medical Supplies
- Orthopaedic & Trauma
- Cardio Thoracic Surgery
- Dental Products
- Clinical Problem Solvers
- Dental Consumables
- Orthodontics
- Oral Surgery
- Student Section
- Periodontics
- Cosmetic Dentistry
- General Dentistry
- Sterilization
- Endodontics
- Kits
- Medical Supplies
- Equipments
- Laboratory
- Implantology
- Instruments
- Basic Dental Products
- Paedodontics
- Preventives
- Corona Safety
- Prosthodontics
- Rative Next
- Dental Furniture
- Dental Equipment
- Restoratives
- Patient Education
- Offers
- Dental Models
- Lab Supplies
- Dialysis Supplies
- Mobility Aids
- Anatomical Models
- Point of Care Testing
- Cath Lab Products
- Gloves
- Medical Simulators
- Rehabilitation
- Medical Accessories
- Cleaning and Waste Management
- Hearing Aids
- Medical Clothing
- Respiratory & Anaesthesia Supplies
- Hospital Apparel, Linen and Personal Protection
- Sterilization, Antiseptics & Disinfectants
- IV, Infusion & Transfusion
- Surgical Instruments
- Medical Equipments
- Surgical Supplies
- Braces, Splints & Supports
- Medical Instruments
- Surgical Sutures
- Body Weight Machine
- Needles & Syringes
- Dental Supplies
- Urology, Ostomy & Incontinence
- Gynecology & Infant Care
- Respiratory Care Products
- Nursing Supplies/Patient Care
- Health & Nutrition
- Wound Care & Dressings
- Medical Equipment
- Ophthalmic Supplies
- Diagnostic Instruments
- Diagnostic & Imaging Supplies