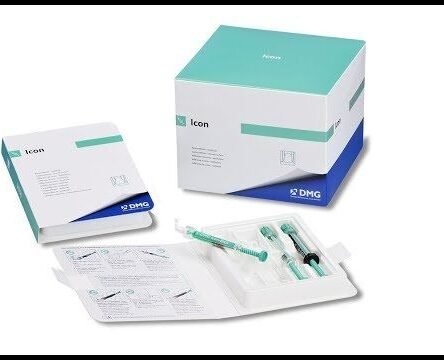

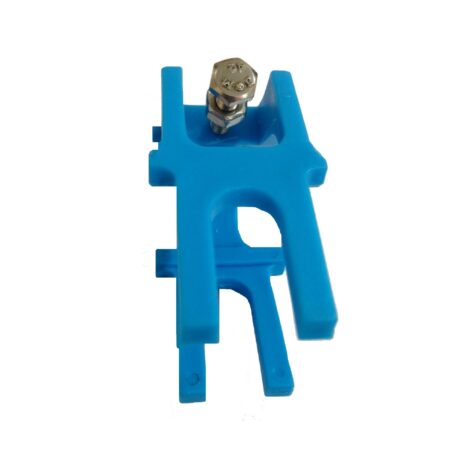
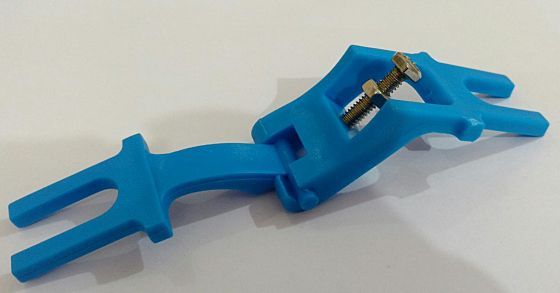
DMG Icon Proximal Surface

Arrests progression of lesions that are too advanced for fluoride therapy, Enables immediate treatment of lesions notyet advanced enough for restoration (drill &fill); ends “wait & see” approach, Next step beyond minimally invasive approach to dentistry, Patient comfort – no drilling pain, Arrests caries progress without unnecessary loss of healthy hard tissue, Prolonged life expectancy of tooth, Patients with poor compliance can be treated earlier, Cosmetic treatment of white spots in one patient visit, Highly esthetic alternative to microabrasion and restorative treatments of cariogenic white spots, Patient comfort and convenience, Frees up additional chairtime
Features
Micro-invasive technology
- Arrests progression of lesions that are too advanced for fluoride therapy
- Enables immediate treatment of lesions notyet advanced enough for restoration (drill &fill); ends “wait & see” approach
- Next step beyond minimally invasive approach to dentistry
No drilling or anesthesia required
- Patient comfort – no drilling pain
- Arrests caries progress without unnecessary loss of healthy hard tissue
Prevents lesion progression
- Prolonged life expectancy of tooth
- Patients with poor compliance can be treated earlier
Treated lesions lose whitish appearance and look like healthy enamel
- Cosmetic treatment of white spots in one patient visit
- Highly esthetic alternative to microabrasion and restorative treatments of cariogenic white spots
Easy treatment in only one visit
- Patient comfort and convenience
- Frees up additional chairtime
- Fluoride therapy not always effective in the advanced stages
- Filling almost always sacrifices significant amounts of healthy tooth structure
- Icon-Etch: Hydrochloric acid, pyrogenic silic – ic acid, surface-active substances
- Icon-Dry: 99% ethanol
- Icon-Infiltrant: Methacrylate-based resin matrix, initiators, additives
- Micro-invasive treatment of non-cavitated dental enamel lesions
- Micro-invasive treatment of non-cavitated dental enamel lesions
- Icon provides an innovative, never-before-seen option for treatment of smooth surface and proximal carious lesions.
- Instead of taking a ait and seeapproach, Icon can arrest the progress of early enamel lesions up to the first third of dentin in one simple procedure, without unnecessary loss of healthy tooth structure!
- Cosmetically remove white spot lesions in just one visit! Icon offers a revolutionary approach to the cosmetic treatment of carious white spot lesions. Lesions infiltrated by Icon take on the appearance of the surrounding healthy enamel. This provides a highly esthetic alternative to micro-abrasion and restorative treatments of cariogenic white spots all in one simple treatment, with no drilling!
- 1 x 0.30ml Syringe Icon-Etch
- 1 x 0.45ml Syringe Icon-Dry
- 1 x 0.45ml Syringe Icon-Infiltrant
- 6 x Smooth Surface Tips
- 7 x 0.30ml Syringe Icon-Etch
- 7 x 0.45ml Syringe Icon-Dry
- 7 x 0.45ml Syringe Icon-Infiltrant
- 42 x Smooth Surface Tips
Description
Icon is used for the micro-invasive treatment of smooth surface and proximal caries lesions. It can be used to treat lesions into the first third of dentin (D-1). In one patient visit, and with no drilling, Icon can arrest the progression of early enamel lesions (caries) and white spot caries-like lesions
Icon represents an entirely new, revolutionary approach to treatment of incipient caries a caries infiltrant. This breakthrough micro-invasive technology fills and reinforces demineralized enamel without drilling or anesthesia.
Failure of Previous treatments fall short because:
Composition
INDICATIONS:
CONTRAINDICATIONS:
Do not use this material: for deeper seated lesions (D2 D3) or on cavitated enamel (enamel defects)
In case of known allergies to any material component or existing contact allergies.
ADVANTAGES:
Key Specifications
General safety information
For dental use only!
Keep out of reach of children!
Caution! Icon-Etch can cause chemical burns. Avoid contact with soft oral tissue, eyes, and skin. In case of inadvertent contact rinse with copious amounts of water, and, if necessary, consult a physician.
Limit the application to the surface to be treated. Avoid contact of the etching gel with the gingiva and adjacent teeth.
Use only the syringe and application tip provided to apply the etching gel in the patient mouth
Discard the application tip after use and cap the syringe.
Caution!
Avoid contact of Icon-Infiltrant and IconDry with eyes and skin.
In case of eye contact, rinse with copious amounts of water, and, if necessary, consult a physician.
In case of skin contact, wash the areas thoroughly with water and soap.
Caution!
Improper use or incorrect application of Icon-Etch may cause pain in patients
Use Icon-Etch on enamel surfaces only. Do not apply onto exposed dentin or cementum.
Packaging
1 Patient Kit:
7 Patient Kit:
Direction to Use
Proximal surface treatment with Icon Resin Infiltrant Proximal Preparation
1. Before the start of treatment, clean the affected tooth and adjacent teeth. Remove any cleaning residue with water spray
2. Create a sufficiently dry working field. Take appropriate measures such as rubber dam, liquid dam or similar, to protect the gingival tissue. Please follow the manufacturer specifications and instructions.
3. To ensure a successful treatment, a proximal separation of approximately 50 microns is required. Introduce one of the enclosed dental wedges into the treatment site.
For better access to the proximal region, the wedge handle can be bent or detached with a twisting motion. In order to obtain sufficient separation of the teeth the wedges must be seated at an adequate depth interproximally.
This should be done gradually: Insert the wedge to the point of resistance. Wait 3 to 5 s and gradually move the wedge deeper until sufficient separation is achieved.
Leave the wedge in the proximal space during the entire treatment procedure.
Alternatively, especially in cases of tight contacts, it is possible to separate the teeth with an orthodontic separator or other separation devices.
Uncovering the lesion body For best treatment results, the hyper mineralized surface layer must be removed
4. Screw the Proximal-Tip onto the Icon-Etch syringe and introduce the application tip into the treatment site. Be sure to align the green side of the Proximal-Tip with the area to be treated.
The material can only be dispensed on the green side of the application tip.
5.Apply an ample amount of Icon-Etch onto the lesion site (1 ? to 2 turns of the shaft). Let Icon-Etch set for 2 minutes. The etching gel will be activated by slightly moving the applicator. Remove excess material.
6. Remove the application tip from the proximal area. Suction off Icon-Etch and rinse with water for a minimum of 30 s. Dry thoroughly with oil-free and water-free air.
Drying For best treatment results the lesion must now be desiccated.
7. Screw the application tip onto the Icon-Dry syringe, apply an ample amount of material onto the lesion and allow to sit for 30 s. Dry thoroughly with oil-free and waterfree air.
Infiltration Now that the lesion is completely desiccated, it is ready to absorb the infiltrating resin when applied.
??Do not apply Icon-Infiltrant under direct operating light as this may cause the material to set prematurely.
8. Screw a new Proximal-Tip onto the Icon-Infiltrant syringe and introduce the application tip into the treatment site. Be sure to alignthe green side of the Proximal-Tip with the area to be treated.
The material can only be dispensed on the green side of the Proximal-Tip.
9. Apply an ample amount of Icon-Infiltrant onto the lesion site (1 ? to 2 turns of the shaft).
10. Let Icon-Infiltrant penetrate fully for 3 minutes. Infiltration will be enhanced by slightly moving the applicator. Add small amounts of material during the three minutes. 11. Remove the application tip from the treatment site. Remove excess material with dental floss
12. Light-cure Icon-Infiltrant from all sides for at least 40 s (total)
13. Screw a new Proximal-Tip onto the IconInfiltrant syringe, repeat the application, and allow to penetrate for 1 minute. Remove the application tip from the site. Remove excess material with dental floss
14. Light-cure Icon-Infiltration from all sides for at least 40 s (total)
15. Screw a new Proximal-Tip onto the IconInfiltrant syringe, repeat the application, and allow to penetrate for 1 minute. Remove the application tip from the site. Remove excess material with dental floss. Then light-cure from all sides for at least 40 s (total)
16. If a second lesion needs to be treated repeat steps 1 through 13 for the affected site
17. Remove the wedge and rubber dam. Use polishing strips for the surface finish.
Smooth surface treatment with Icon Resin Infiltrant Smooth Surface Preparation
1. Before the start of treatment, clean the affected tooth and adjacent teeth. Remove any cleaning residue with water spray.
2. Create a sufficiently dry working field. Take appropriate measures; such as rubber dam, liquid dam or similar, to protect the gingi – val tissue. Please follow the manufactur – er specifications and instructions.
Do not use rubber dams made from thermoplastic elastomers. Ensure that the treated lesion is completely accessible.
Uncovering the lesion body For successful elimination of white spots, it is imperative that the surface layer of the lesion is completely removed in order for the Infiltrant to gain access to the lesion body.
The light application of a medium grit abrasive disk can be utilized in cases of highly demineral – ized white spot lesions prior to etching.
3. Screw the Smooth Surface-Tip onto the Icon-Etch syringe.
4. Apply an ample amount of Icon-Etch onto the lesion site by turning the syringe shaft carefully. Periodically massage the Etch over the 2 minute period. Remove excess mate – rial with a cotton wad.
Note: Unless white spots are treated early, i. e. 1 to 2 months after bracket removal, it is recommend – ed to repeat the etching step up to three times.
5. Suction off Icon-Etch and rinse with water for at least 30 s. Dry with oil-free and waterfree air
Visual Inspection To ensure successful infiltration, the lesion must now be desiccated and inspected. ??In this step, a preview of the final result is shown. When wetted with Icon-Dry, the whitish-opaque coloration on the etched enamel should diminish. If this is not the case, repeat the etching step once or twice for 2 minutes each, and rinse and dry the teeth again (steps 3-5).
6. Screw the application tip onto the Icon-Dry syringe, apply an ample amount of materi – al onto the lesion, and allow to set for 30 s.
Drying For best treatment results, it is necessary to dry the lesion in-depth.
7. After the visual inspection, dry the lesion thoroughly with oil-free and water-free air. Infiltration Now that the lesion is completely desiccated, it is ready to absorb the infiltrating resin when applied
8. Screw a new Smooth Surface-Tip onto the Icon-Infiltrant syringe.
Do not apply Icon-Infiltrant under direct operating light as this may cause the mate – rial to set prematurely
9. Apply an ample amount of Icon-Infiltrant onto the etched, dried surface by turning the shaft.
10. Allow Icon-Infiltrant to penetrate for 3 min – utes adding material to keep the surface wet. The infiltration will be enhanced by slightly massaging with the applicator.
In case of deeper and larger defects the esthet – ic result can be improved by extending the exposure time up to 6 minutes.
11. Remove excess material with a cotton wad and dental floss.
12. Light-cure Icon-Infiltrant for 40 s.
13. Screw a new Smooth Surface-Tip onto the Icon-Infiltrant syringe, repeat the application, and allow penetration for 1 minute. Remove excess material with a cotton wad and dental floss, and light-cure for a minimum of 40 s
14. Remove the rubber dam. Use polishing cups (or similar) for the surface finish.
Side effects
In some cases, contact allergies with similar composite products have been reported
Contact of Icon-Etch with the oral mucosa causes a white surface coloration. This will subside after a few days.
Interaction
Polymerization inhibiting substances such as products containing eugenol (e. g. temporary cements) must not be used in combination with this material.
1. We offer Worldwide Shipping by Courier via Air or Sea mode.
2. Product will be dispatched within 5-7 working days.
3. Delivery will take a maximum of 7-15 days, based on the shipping option you choose.
4. Kindly check customs restrictions and rules in your country for specific products, mostly 99% shipments are cleared and delivered smoothly.
5. For Bulk inquiries or customized manufacturing please contact us.
Product Enquiry
Related Products
Allows prosthetic work to be done in the absence of the patient, Hinge articulator which gives only opening and closing jaw movements, Helps in establishment of proper occlusal settings in both RPD and CD.
Allows prosthetic work to be done in the absence of the patient, Hinge articulator which gives only opening and closing jaw movements, Helps in establishment of proper occlusal settings in both RPD and CD.
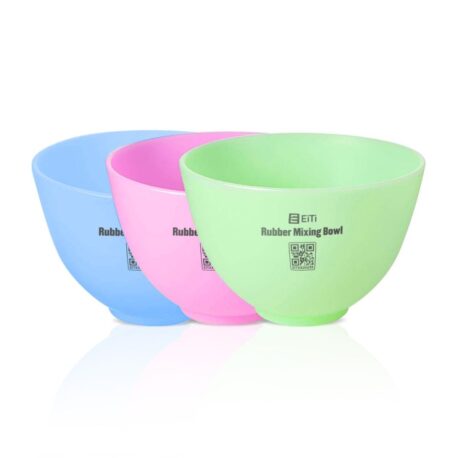
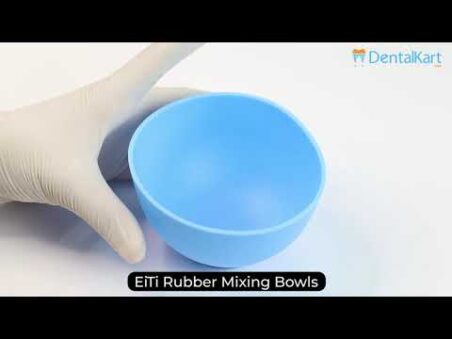
Flexible rubber, Easy to clean, Washable for repeated use, Use to mix dental alginate and plaster. Different size can be suitable to different works, Perfect tools specially designed for Dental Lab Work